
目标:纯 NVMe 固态的群晖
已知的群晖系统中,M.2 NVMe 只能做为存储池,并且不支持首次安装系统作为存储池,同时想使用 M.2 存储池的话,还得是特殊机型,目前来说,最后一点非常好解,可选的方案有:
- 手动创建 M2 存储池,链接:Github
- 手动修改 M2 盘的属性后,存储管理页面创建
- Patch
libhwcontrol.so后,存储管理页面创建
那么目前来说,纯 NVMe 固态的群晖缺少的一环是:安装系统的时候,直接安装到 M.2 NVMe 固态,本文将粗略的讲解如何实现这一点的。
过程探索
虚拟群晖额外的环境准备如下:
- 创建虚拟 NVMe SSD 盘(qemu-img create -f raw nvme0.raw 64G)
- 虚拟机添加 NVMe 参数(-drive file=nvme0.raw,if=none,format=raw,id=nvme0 -device nvme,drive=nvme0,serial=nvme0)
本文测试环境添加了两块虚拟盘
1. 安装页面
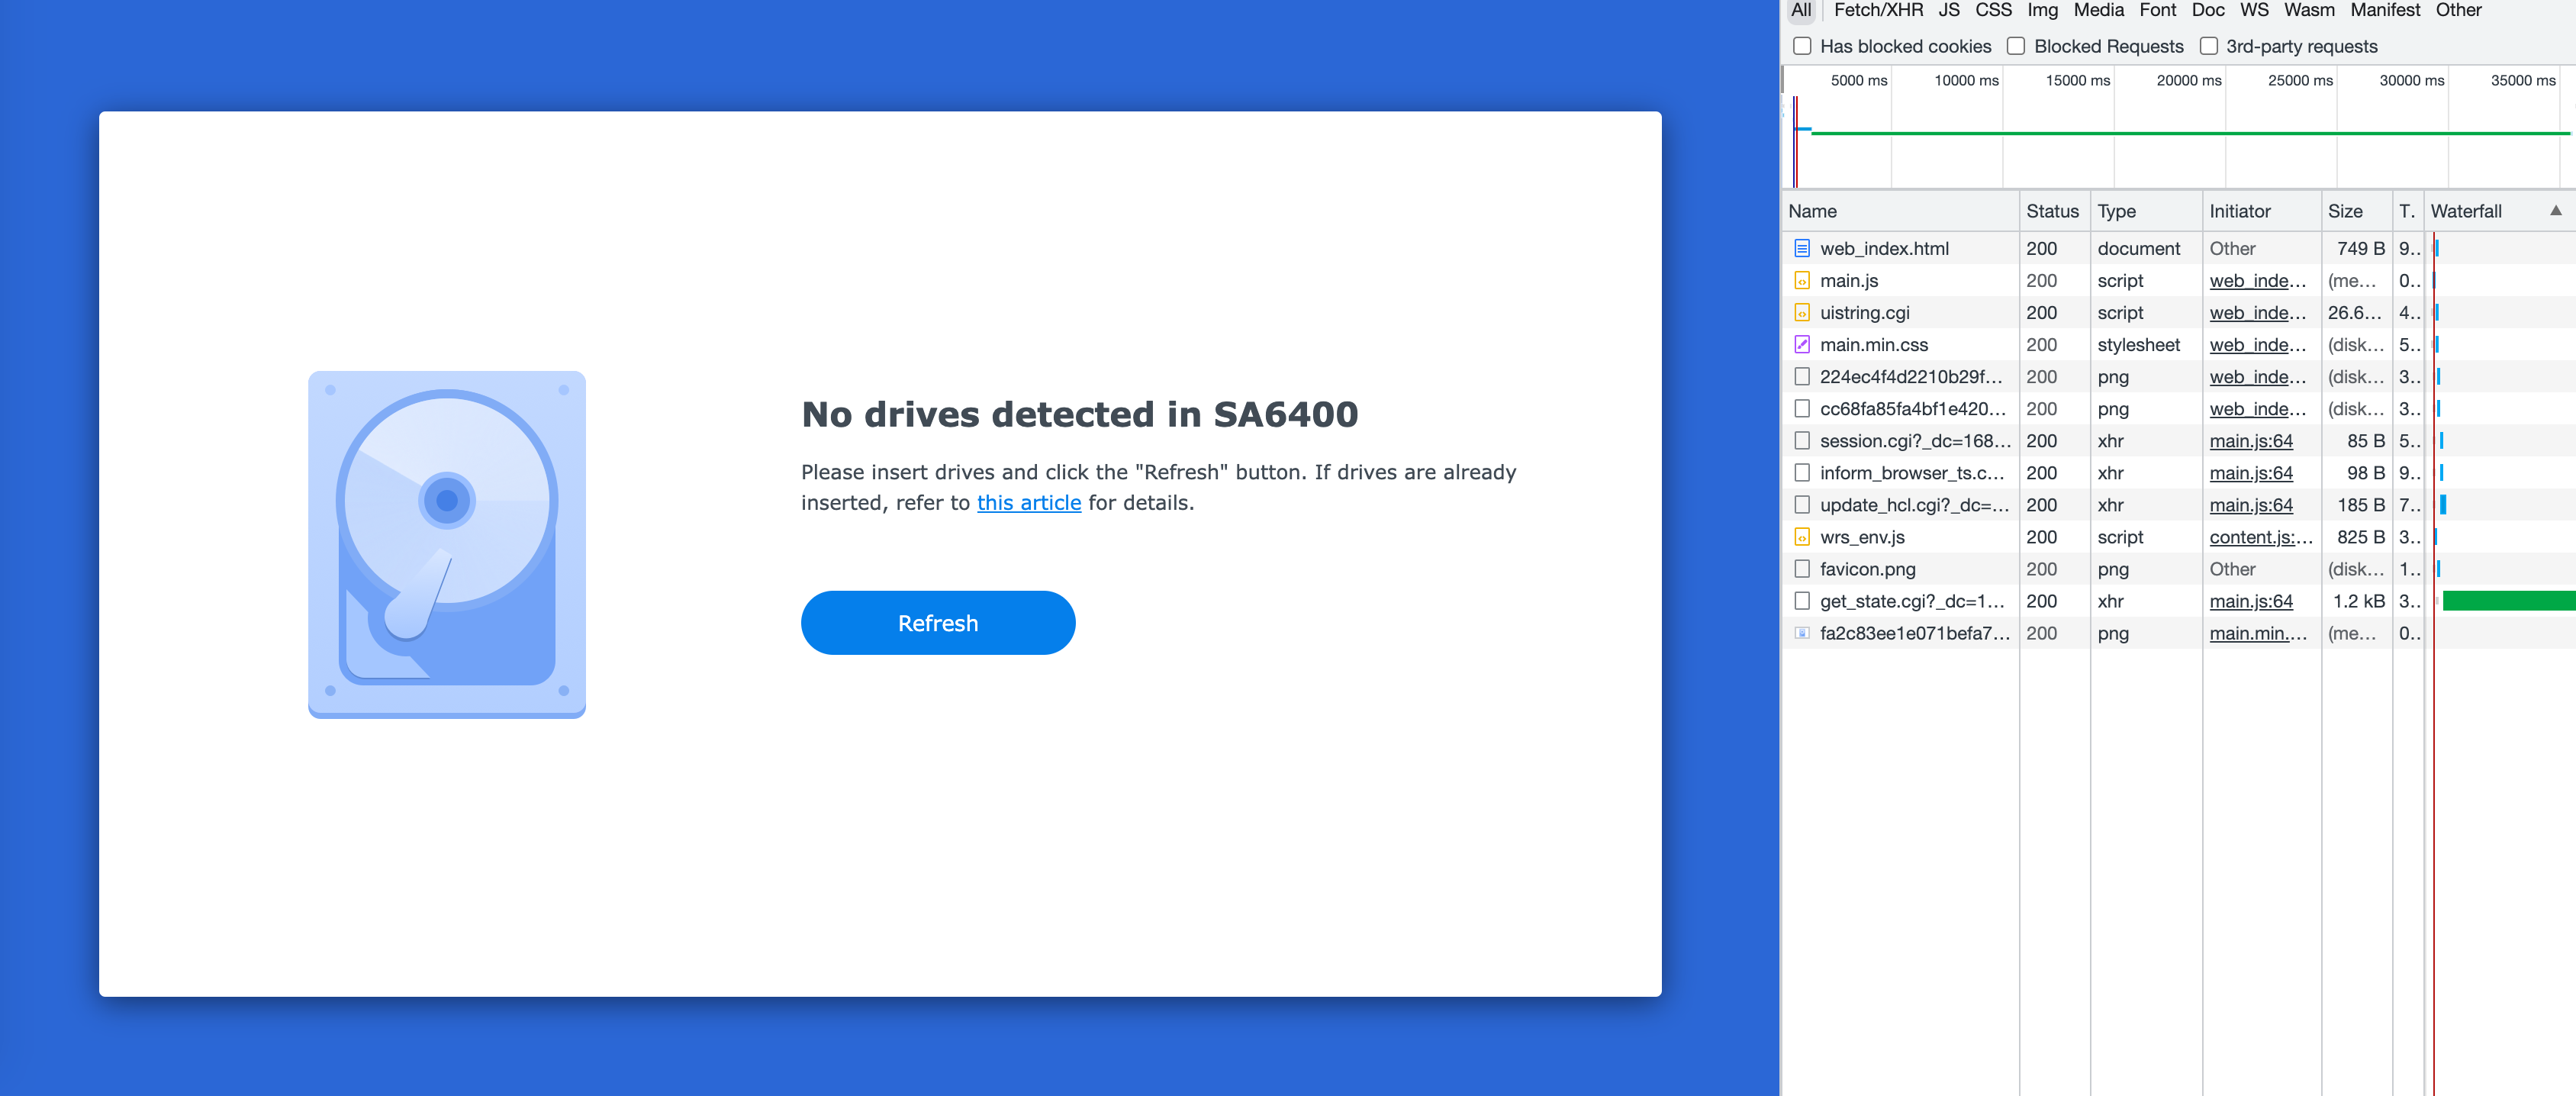
按照上面的操作,仅添加虚拟的 NVMe SSD 盘的时候,安装页面会显示如下图的找不到盘的提示,我们这里看一下截图右边的网络请求,查看所有的异步请求,发现倒数第二个里有硬盘相关的信息,我们就从这里查看下去。
2. 进 ramdisk
查看 get_state.cgi 输出
get_state.cgi 是 nginx 代理的 cgi 程序,这个文件在 ramdisk 里其实上是一个 shell 脚本,我们先看一下输出,第 4 行直接说了没有磁盘:
{\"success\": true,\"data\": {\"has_disk\": false,\"dsinfo\": {\"product\": \"Synology NAS\",\"model\": \"SA6400\",\"internet_ok\": \"false\",\"internet_install_ok\": false,\"internet_migrate_ok\": true,\"internet_reinstall_ok\": true,\"internet_install_version\": \"\",\"internet_migrate_version\": \"DSM 7.1.1-42962\",\"internet_reinstall_version\": \"DSM 7.1.1-42962\",\"ip_addr\": \"192.168.3.172\",\"mac_addr\": \"\",\"serial\": \"0000XXXBN4YYY\",\"build_num\": 42962,\"build_ver\": \"7.1.1-42962\",\"is_installing\": false,\"clean_all_partition_disks\": \"\",\"buildin_storage\": false,\"disk_size_enough\": true,\"disk_count\": 0,\"support_dual_head\": \"\",\"unique_rd\": \"epyc7002\",\"update_hcl_status\": \"success\",\"incompatible_disks\": null,\"syno_incompatible_disks\": \"\",\"missing_system_disks\": \"\",\"root_on_isolated_disk\": \"\",\"disabled_port_disks\": \"\",\"ssd_cache_status\": \"\",\"sas_frimware_upgrade_fail\": false,\"unidentified\": false,\"status\": \"\",\"hostname\": \"SynologyNAS\"}}}
这里再查看 get_state.cgi 关于 \"has_disk\": false 的相关代码:
partition=\"$(/usr/syno/bin/synodiskport -installable_disk_list)\"SupportBuildinStorage=\"$(/bin/get_key_value /etc.defaults/synoinfo.conf support_buildin_storage)\"if [ \"xyes\" != \"x${SupportBuildinStorage}\" ]; thenbuildin_storage=\'false\'if [ ! -z \"$partition\" ];thenhas_disk=\'true\'elsehas_disk=\'false\'fidisk_count=`echo $partition | wc -w`elsebuildin_storage=\'true\'has_disk=\'true\'disk_name=$(basename ${buildin_storage_node})disk_size=$(cat /sys/block/${disk_name}/size)if [ \"0\" -eq \"${disk_size}\" ]; thenhas_disk=\'false\'elif [ \"${min_buildin_storage_size}\" -gt \"${disk_size}\" ]; thendisk_size_enough=\'false\'fifi
想要得到 has_disk=\'true\',可以下手的地方有: 7, 14 这两行,测试的 SA6400 存储不是内置的,所以这里选择第 7 行,那么就需要第 6 行的 partition 不为空,而 partition 是执行 /usr/syno/bin/synodiskport -installable_disk_list 得到的。
查看 synodiskport -installable_disk_list
这里直接执行 synodiskport -installable_disk_list 发现什么都没返回,尝试写了 shell 脚本去遍历 /sys/block 获取 SATA 和 NVMe 磁盘:
#!/bin/shif [ \"$1\" == \"-installable_disk_list\" ]; thendisks=$(ls /sys/block | grep \'(nvme*|sata*)\' | xargs)echo \" \"$diskselse/path/to/old/synodiskport \"$@\"fi
刷新页面后,可以发现,已经识别到硬盘了,上次 pat 文件尝试安装后,发现浏览器请求 get_install_progress.cgi 报错了:
{\"success\": false,\"data\": {},\"errinfo\": {\"sec\": \"error\",\"key\": \"error_mkfs\",\"line\": 35}}
看一下相关日志:
messages:Apr 12 2227 install.cgi: ninstaller.c:1167 SYSTEM_NOT_INSTALLED: Raid but md0 not existmessages:Apr 12 2227 install.cgi: ninstaller.c:1235 SYSTEM_NOT_INSTALLED: Not SynoParitition and Not Recoverablemessages:Apr 12 2227 install.cgi: ninstaller.c:1142(FillUpgradeVolumeInfo): gszUpgradeVolDev = /dev/md0messages:Apr 12 2227 install.cgi: ninstaller.c:1143(FillUpgradeVolumeInfo): gszUpgradeVolMnt = /tmpDatamessages:Apr 12 2227 install.cgi: ninstaller.c:1245 gblSupportRaid: 1, gSysStatus: 3, gblCreateDataVol: 0, gblSystemRecoverable: 0messages:Apr 12 2227 install.cgi: ninstaller.c:1699 CreateDataVol=[0]messages:Apr 12 2227 install.cgi: ninstaller.c:158 umount partition /tmpDatamessages:Apr 12 2227 install.cgi: ninstaller.c:162 Fail to execute [/bin/umount -f /tmpData > /dev/null 2>&1]messages:Apr 12 2227 install.cgi: ninstaller.c:1710 installer cmd=[/usr/syno/sbin/installer.sh -r >> /tmp/installer_sh.log 2>&1]messages:Apr 12 2227 install.cgi: ninstaller.c:1715 szCmd=[/usr/syno/sbin/installer.sh -r >> /tmp/installer_sh.log 2>&1], retv=[1]messages:Apr 12 2227 install.cgi: ninstaller.c:1739 retv=[1]messages:Apr 12 2227 install.cgi: ninstaller.c:1740(ErrFHOSTDoFdiskFormat) retv=[1]
继续看 /tmp/installer_sh.log:
Check new disk...umount: can\'t unmount /volume1: Invalid argumentraidtool destroy 0Not found /dev/md0raidtool destroy 1Not found /dev/md1[CREATE] Raidtool initsys[CREATE][failed] Raidtool initsys
/usr/syno/sbin/installer.sh 执行报错了,查看该文件后,报错是执行 /sbin/raidtool initsys 导致的。
我们再看看 /usr/syno/bin/synodiskport 和 /sbin/raidtool 这两个命令:
ls -alh /usr/syno/bin/ /sbin/raidtool | grep \'(synodisk|raidtool)\'lrwxrwxrwx 1 root root 19 Apr 12 22:48 /sbin/raidtool -> /usr/syno/bin/scemd-rwx------ 1 root root 180 Apr 12 22:17 synodiskport
都软链接到了 scemd,而 scemd 研究群晖引导较多的都知道,这个是类似 busybox 一样的工具,根据当前执行命令,执行不同的操作。
那下面就需要逆向 scemd 这个二进制文件,看看具体的找盘逻辑了。
3. 逆向分析
我们需要逆向 scemd 中查找可安装盘的逻辑,这里使用 bpftrace 抓了很多输出,一点点给代码加了注释,使用到的 bpftrace 脚本:
uretprobe:\"/usr/syno/bin/synodiskport\":0xABCCC {printf(\"is_suppornmve return: %dn\", retval);}uretprobe:\"/usr/syno/bin/synodiskport\":0x5AA09 {printf(\"is_support_local_only_dev return: %dn\", retval);}uretprobe:\"/usr/syno/bin/synodiskport\":0x6FFF0 {printf(\"enumerate_disks return: %dn\", retval);}uretprobe:\"/usr/syno/bin/synodiskport\":0x5A7BF {printf(\"support_dual_head return: %dn\", retval);}uprobe:\"/usr/syno/bin/synodiskport\":0x591CF {printf(\"list_insert, string: %sn\", str(arg1));}uprobe:\"/usr/syno/bin/synodiskport\":0x6FC50 {printf(\"enumerate_disks_with_type, type: %dn\", arg0);}uretprobe:\"/usr/syno/bin/synodiskport\":0x6FC50 {printf(\"enumerate_disks_with_type, return: %dn\", retval);}uprobe:\"/usr/syno/bin/synodiskport\":0x6F580 {printf(\"SynoDiskPathGlobAndPortCheck, disk type: %dn\", *(uint64 *)arg1);}uretprobe:\"/usr/syno/bin/synodiskport\":0x6F580 {printf(\"SynoDiskPathGlobAndPortCheck, return: %dn\", retval);}uprobe:\"/usr/syno/bin/synodiskport\":0x75390 {printf(\"disk_maybe_blocked, disk name: %sn\", str(arg0));}uretprobe:\"/usr/syno/bin/synodiskport\":0x75390 {printf(\"disk_maybe_blocked, return: %dn\", retval);}uretprobe:\"/usr/syno/bin/synodiskport\":0x70A70 {printf(\"get_disk_type_by_name, return: %dn\", retval);}uprobe:\"/usr/syno/bin/synodiskport\":0xF370 {printf(\"strstr, string: %s, sub str: %sn\", str(arg0), str(arg1));}uretprobe:\"/usr/syno/bin/synodiskport\":0xF370 {printf(\"strstr, return: %sn\", str(retval));}uprobe:\"/usr/syno/bin/synodiskport\":0x94FD0 {printf(\"nvme_dev_port_check, name: %sn\", str(arg0));}uretprobe:\"/usr/syno/bin/synodiskport\":0x94FD0 {printf(\"nvme_dev_port_check, return: %dn\", retval);}uprobe:\"/usr/syno/bin/synodiskport\":0x98900 {printf(\"sata_dev_port_check, name: %sn\", str(arg0));}uretprobe:\"/usr/syno/bin/synodiskport\":0x98900 {printf(\"sata_dev_port_check, return: %dn\", retval);}
具体调试流程就不描述了,花了很多时间阅读了伪代码。
这里贴一下 IDA 里关键伪代码:
__int64 __fastcall SYNODiskPathGlobAndPortCheck(__int64 glob_list,_DWORD *disk_type,int check_type,_QWORD *disk_list){bool should_check_type; // r14int index; // ebpchar **gl_pathv; // r15const char *v7; // raxconst char *v8; // r13int v9; // eax__int64 v10; // r13char *v11; // rax__int64 disk_name; // r15int tmp_disk_type; // eaxunsigned int v14; // ebxglob64_t pglob; // [rsp+10h] [rbp-88h] BYREFunsigned __int64 v18; // [rsp+58h] [rbp-40h]v18 = __readfsqword(0x28u);memset(&pglob, 0, sizeof(pglob));if ( check_type <= 0 && disk_type|| ((unsigned __int8)check_type & (disk_type == 0LL)) != 0|| !disk_list|| !*disk_list|| !glob_list ){v14 = -1;__syslog_chk(3LL, 1LL, \"%s:%d Bad parameter\", \"external/external_disk_port_enum.c\", 42LL);gl_pathv = pglob.gl_pathv;goto LABEL_29;}should_check_type = disk_type != 0LL && check_type > 0;if ( *(int *)(glob_list + 4) <= 0 )return 0;index = 0;while ( 1 ){v7 = (const char *)list_get(glob_list, index);memset(&pglob, 0, sizeof(pglob));v8 = v7;// 返回值 0 表示匹配到v9 = glob64(v7, 8, 0LL, &pglob);if ( v9 )break;gl_pathv = pglob.gl_pathv;if ( pglob.gl_pathc ){v10 = 0LL;while ( 2 ){v11 = strrchr(gl_pathv[v10], \'/\'); // 找到最后一个 /if ( !v11 )goto LABEL_21;disk_name = (__int64)(v11 + 1);tmp_disk_type = get_disk_type_by_name(v11 + 1);if ( should_check_type ){if ( tmp_disk_type == *disk_type )goto LABEL_19;}else if ( tmp_disk_type != 10 ){LABEL_19:list_insert((__int64)disk_list, disk_name);}gl_pathv = pglob.gl_pathv;LABEL_21:if ( pglob.gl_pathc <= ++v10 )break;continue;}}LABEL_12:if ( gl_pathv )globfree64(&pglob);if ( *(_DWORD *)(glob_list + 4) <= ++index ){gl_pathv = pglob.gl_pathv;v14 = 0;goto LABEL_29;}}if ( v9 == 2 ){__syslog_chk(3LL, 1LL, \"%s:%d read error :%s\", \"external/external_disk_port_enum.c\", 58LL, v8);goto LABEL_27;}if ( v9 != 1 ){gl_pathv = pglob.gl_pathv;if ( v9 != 3 )goto LABEL_28;goto LABEL_12;}__syslog_chk(3LL,1LL,\"%s:%d out of memory to alloc glob function when looking for:%s\",\"external/external_disk_port_enum.c\",60LL,v8);LABEL_27:gl_pathv = pglob.gl_pathv;LABEL_28:v14 = -1;LABEL_29:if ( gl_pathv )globfree64(&pglob);return v14;}
在 SYNODiskPathGlobAndPortCheck 里有逻辑是,按照磁盘类型找磁盘,然后再反向检查一遍,如果类型匹配则添加到列表中(第 58 行),默认的 SATA 磁盘类型是 1,要去掉这个类型的检查,那为了能找到安装盘,我们这个给取个反后,重新构建引导并启动后,可以正常在安装页面查找到磁盘了,并且成功安装,进入重启流程。
4. 安装系统后还是进入 ramdisk
安装成功,发现重启后依旧进入 ramdisk 模式,查看日志后发现有以下报错:
System volume is assembled with SSD Cache only, please remove SSD Cache and then reboot
这个错误是 /linuxrc.syno.impl 里做的检查,意思就是系统盘不能是 SSD Cache,具体代码:
SupportSSDCache=`/bin/get_key_value /etc.defaults/synoinfo.conf support_ssd_cache`if [ \"$SupportDualhead\" != \"yes\" ] && [ \"${SupportSSDCache}\" = \"yes\" ] && [ -d \"/sys/block/md0\" ]; thenWithInternal=0has_md0disk=0# check if any disk is INTERNAL, otherwise return failfor path in /sys/block/md0/md/dev-*; do[ -e \"$path\" ] || continuedisk=\"$(basename \"$path\"| cut -c 5-)\"[ -z \"$disk\" ] && continuehas_md0disk=1PortType=`/usr/syno/bin/synodiskport -portcheck \"${disk}\"`if [ \"${PortType}\" = \"SAS\" ] || [ \"${PortType}\" = \"SATA\" ] || [ \"${PortType}\" = \"SYS\" ]; thenWithInternal=1fidone# has raid0 and not composed by internal diskif [ \"$has_md0disk\" = 1 ] && [ ${WithInternal} -eq 0 ]; thenecho \"System volume is assembled with SSD Cache only, please remove SSD Cache and then reboot\" >> /var/log/messagesExit 8 \"System volume is assembled with SSD Cache only\"fifi
那就简单了,编译引导的时候,直接替换掉:sed -i \'s/WithInternal=0/WithInternal=1/\' ${RAMDISK_PATH}/linuxrc.syno.impl
5. 正常进入系统
重新编译引导后,终于正常进入系统,但是还有新问题:在存储管理器里找不到 NVMe 盘,继续探索。尝试添加一块 sata 盘后,正常操作,那可能还是在查看磁盘的时候有问题(因为没有 sata 盘),查看日志后发现对应的错误:
2023-04-12T2225+08:00 TestSA6400 scemd[17874]: disk/disk_info_enum.c:297 cann\'t find enumlist_det, try to diskInfoEnum failed2023-04-12T2225+08:00 TestSA6400 scemd[17874]: disk/shared_disk_info_enum.c::84 Failed to allocate list in SharedDiskInfoEnum, errno=0x900.
SharedDiskInfoEnum 应该是具体的函数名,不过肯定被 strip 掉了,查找字符串关键字。
群晖安装好的系统里的 scemd 比 ramdisk 里的 scemd 二进制小了很多,是动态链接的,查找了一圈,发现相关函数在 libhwcontrol.so.1 中,参考 scemd 中的修改后,发现磁盘数翻倍了,继续分析一下,应该是磁盘类型 1 返回了 3 块 NVMe 盘,磁盘类型 7 也返回了相同的盘,所以这里选择跳过没有找到磁盘类型 1 的检查,对应下面伪代码的 23 行 v1 < 0。
IDA 里的伪代码:
__int64 __fastcall SLIBDiskInfoEnumToCache(__int64 a1){int v1; // r12dint v2; // r13dint v3; // r14dint v4; // r15dint v5; // eaxint v6; // ebpFILE *v7; // rbx_QWORD *v8; // rbpunsigned int v9; // ebxint v11; // [rsp+Ch] [rbp-4Ch]void *ptr[9]; // [rsp+10h] [rbp-48h] BYREFptr[1] = (void *)__readfsqword(0x28u);ptr[0] = 0LL;v1 = enumerate_disks_by_type((__int64)ptr, 1LL, a1);v2 = enumerate_disks_by_type((__int64)ptr, 3LL, a1);v3 = enumerate_disks_by_type((__int64)ptr, 7LL, a1);v4 = enumerate_disks_by_type((__int64)ptr, 11LL, a1);v11 = enumerate_disks_by_type((__int64)ptr, 4LL, a1);v5 = enumerate_disks_by_type((__int64)ptr, 2LL, a1);if ( v1 < 0 || v2 < 0 || v3 < 0 || v4 < 0 || v11 < 0 || (v6 = v5, v5 < 0) ){v9 = -1;}else{v7 = fopen64(\"/tmp/enumlist_det.tmp\", \"wb\");if ( v7 ){v8 = ptr[0];if ( ptr[0] ){do{if ( !*v8 )break;sub_40AE0(v7);v8 = (_QWORD *)v8[1];}while ( v8 );}fclose(v7);v9 = rename(\"/tmp/enumlist_det.tmp\", \"/tmp/enumlist_det\");if ( v9 ){v9 = 0;__syslog_chk(4LL,1LL,\"%s:%d Failed to rename %s into %s.\",\"disk/disk_info_enum.c\",456LL,\"/tmp/enumlist_det.tmp\",\"/tmp/enumlist_det\");}}else{v9 = v6 + v11 + v4 + v3 + v1 + v2;__syslog_chk(3LL, 1LL, \"%s:%d fail to save enumlist, device is busy....n\", \"disk/disk_info_enum.c\", 441LL);}}DiskInfoEnumFree(ptr[0]);return v9;}
再次更新 libhwcontrol.so.1 并重启后,存储管理的磁盘显示正常。
6. 创建存储池页面无 RAID 类型
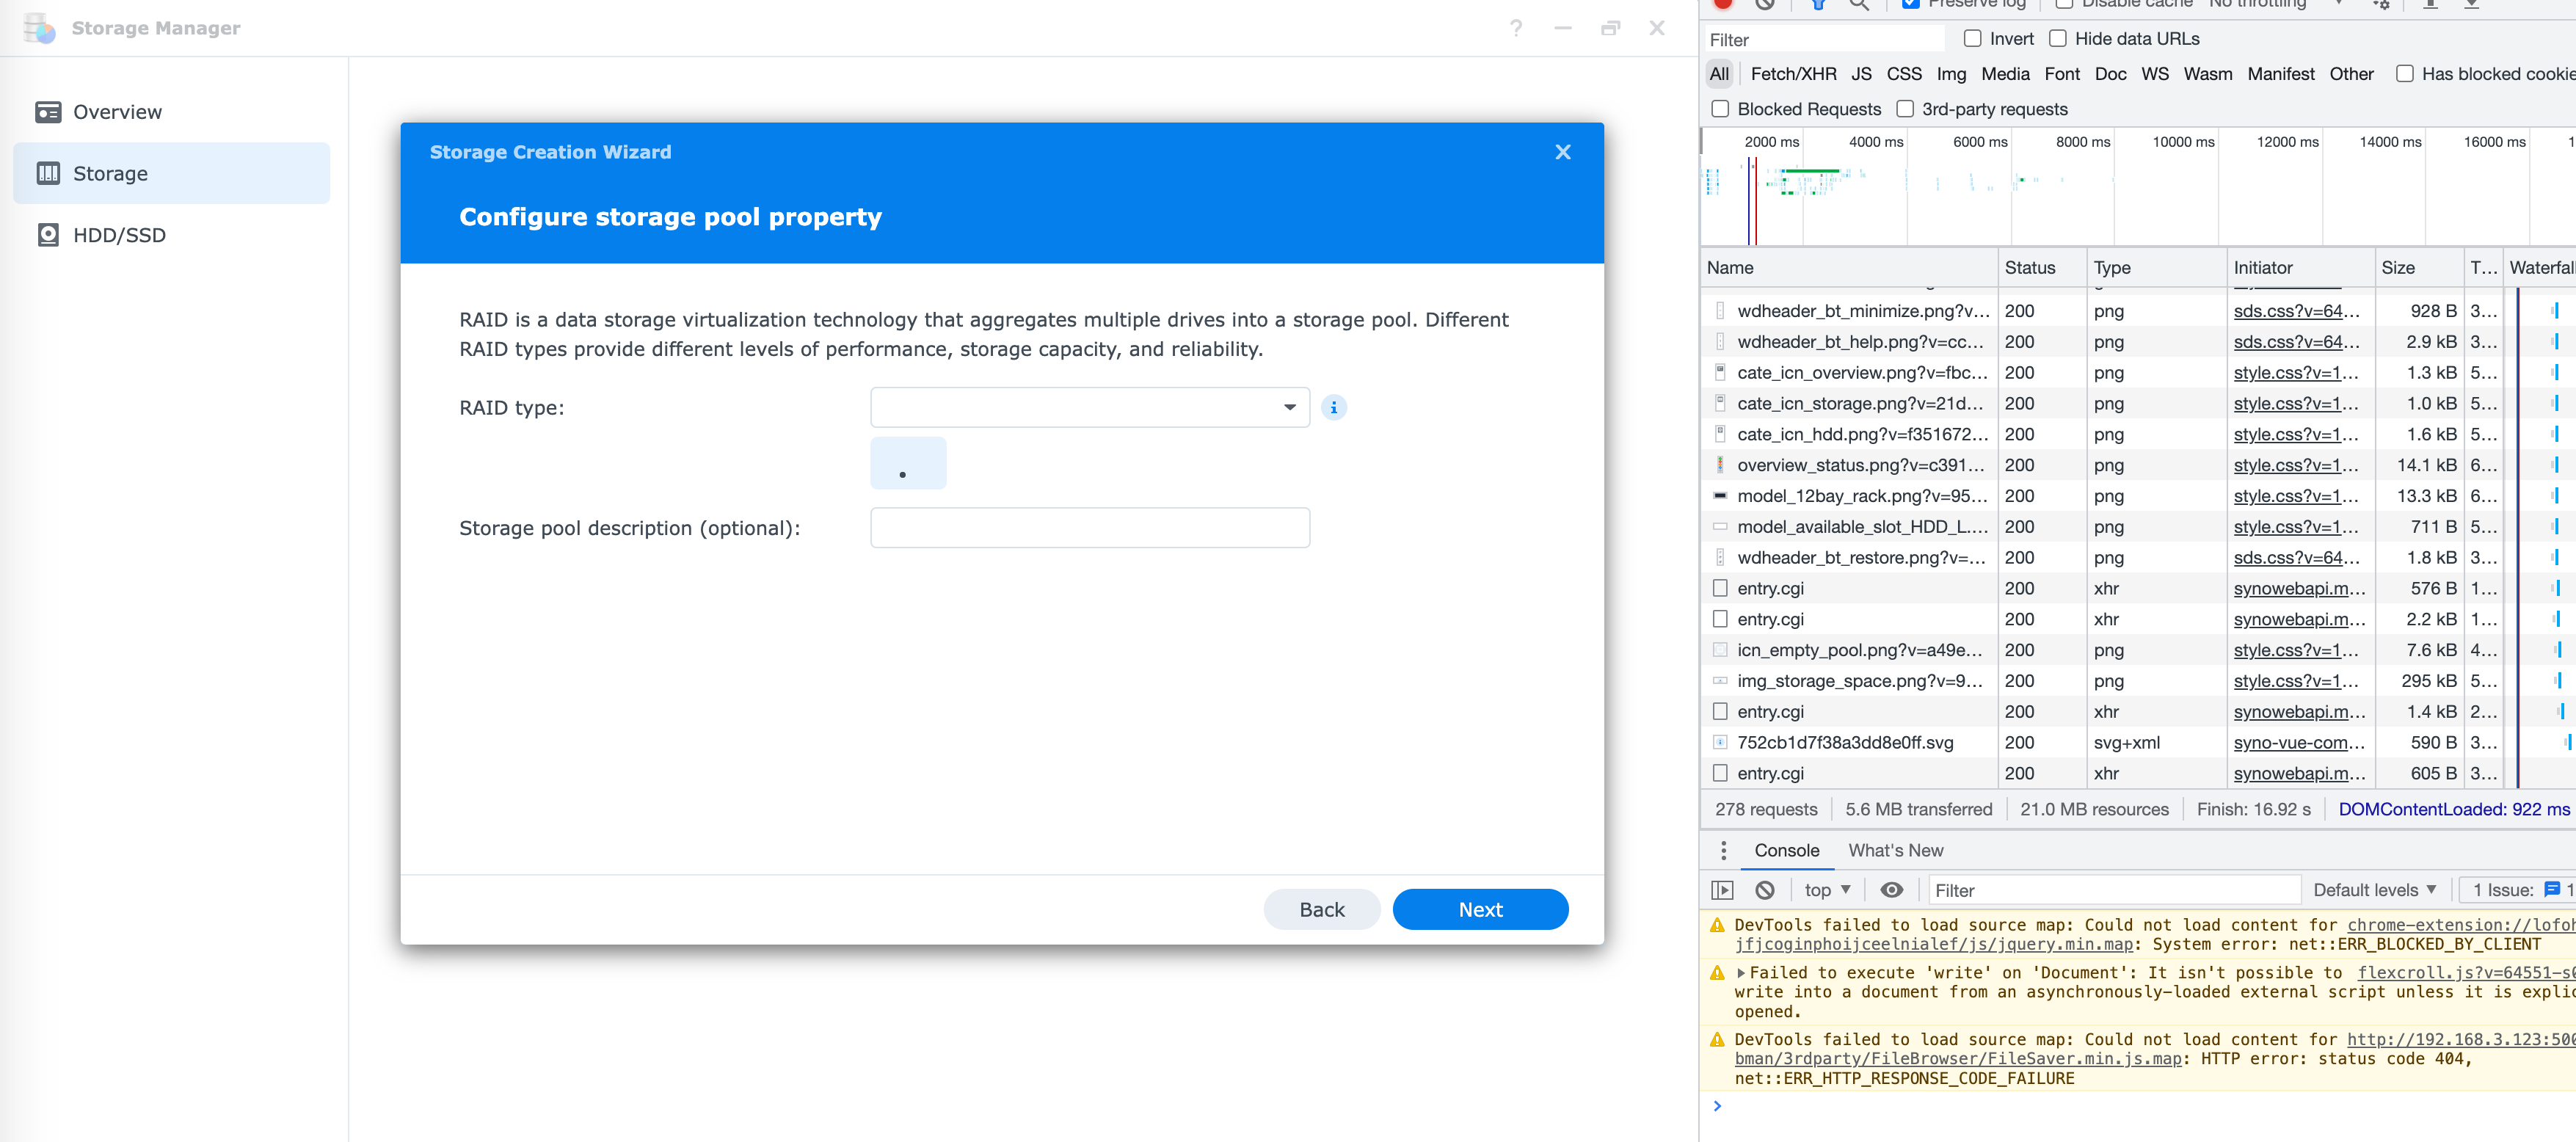
再次回到存储管理,选择创建存储池,发现 RAID 类型为空,前面都已经能看到具体磁盘了,猜测这里大概率是前端逻辑的问题了,经过一番查找发现有如下一段代码在 storage_panel.js 中:
isCacheTray() {return \"cache\" === this.portType}raidTypeStore() {if (SYNO.SDS.StorageUtils.isSingleBay() && (!this.isNeedSelectSource || \"internal\" === this.selectDiskSource))return [{label: this.T(\"volume\", \"volume_type_basic\"),value: \"basic\"}];let e = [], t = 0, s = {}, i = (e,t,s)=>{this.raidTypeSupportTable[s].support && e && t.push({label: this.raidTypeSupportTable[s].label,value: s})};for (let e of this.disks) {if (\"disabled\" === e.portType || e.isCacheTray())continue;let t, i = e.container;if (\"number\" != typeof s[i.order]) {if (\"ebox\" === i.type) {if (SYNO.SDS.StorageUtils.supportSas && this.env.AHAInfo)t = this.env.AHAInfo.enclosures[i.order - 1].max_disk;else if (t = SYNO.SDS.StorageUtils.GetEboxBayNumber(i.str),0 === t)continue} elset = +this.D(\"maxdisks\", \"1\");s[i.order] = t}}for (let[e,i] of Object.entries(s))SYNO.SDS.StorageUtils.isSupportRaidCross() ? t += i : t = Math.max(t, i);return SYNO.SDS.StorageUtils.supportRaidGroup || !SYNO.SDS.StorageUtils.isSupportSHR() || \"pool_type_multi_volume\" !== this.poolType || this.S(\"ha_running\") || (i(1 <= t, e, \"shr\"),i(4 <= t, e, \"shr_2\")),i(2 <= t, e, \"raid_1\"),i(3 <= t, e, \"raid_5\"),i(4 <= t, e, \"raid_6\"),i(4 <= t, e, \"raid_10\"),i(1 <= t, e, \"basic\"),i(1 <= t, e, \"raid_linear\"),i(2 <= t, e, \"raid_0\"),i(SYNO.SDS.StorageUtils.supportDiffRaid && 3 <= t, e, \"raid_f1\"),e}
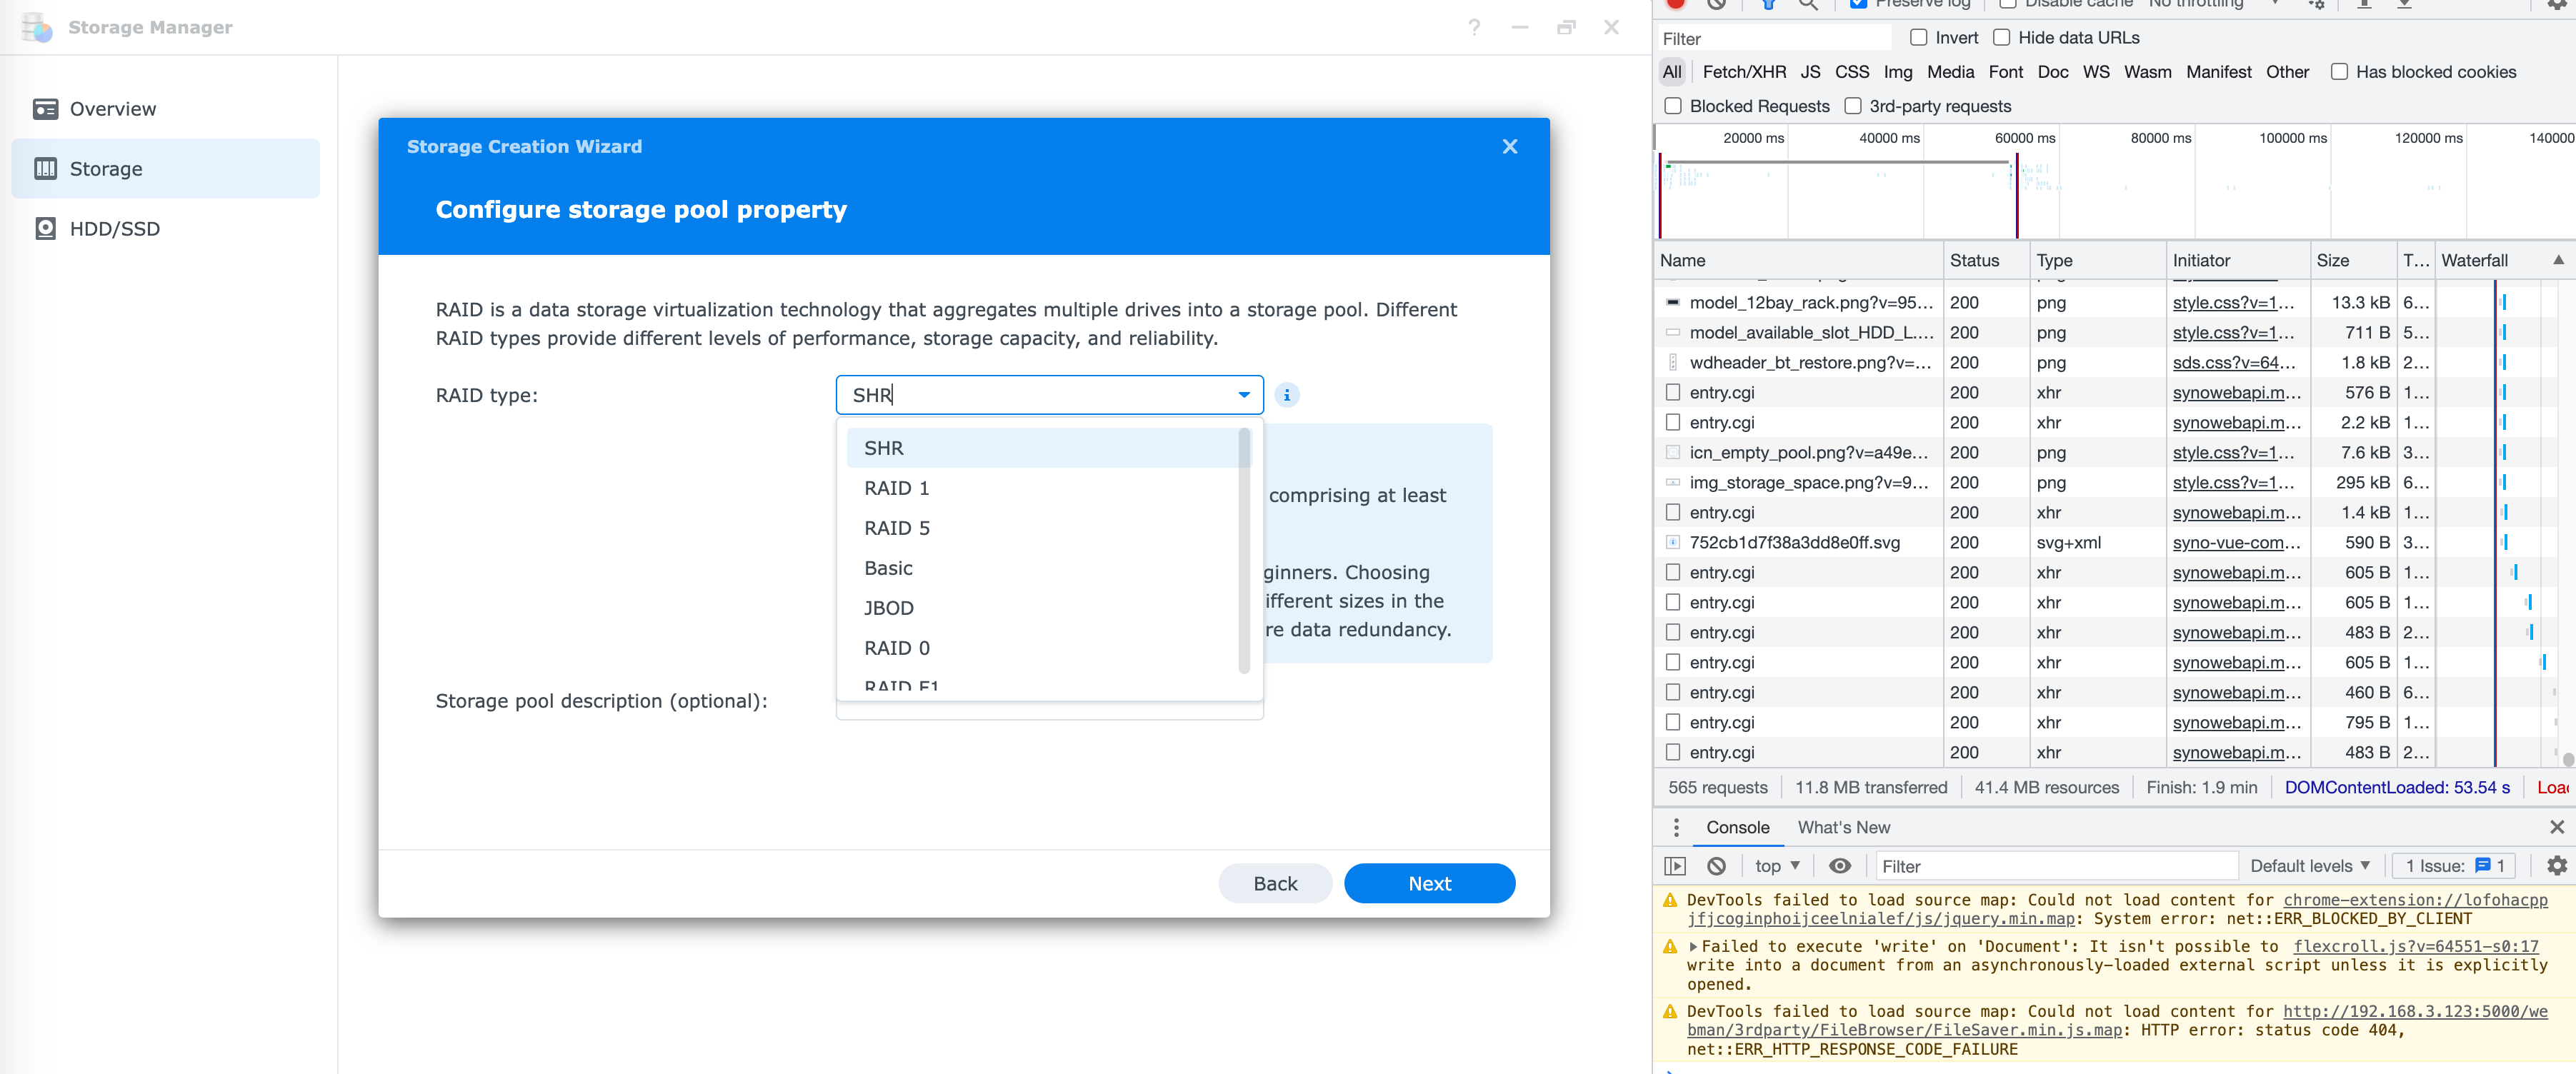
这里 22 行的 if (\"disabled\" === e.portType || e.isCacheTray()) 会跳过所有 SSD Cache 盘,由于我们没有 SATA 盘,全跳过的话,自然就没有磁盘去判断 RAID 类型了,所以这里直接跳过 e.isCacheTray() 的检查。
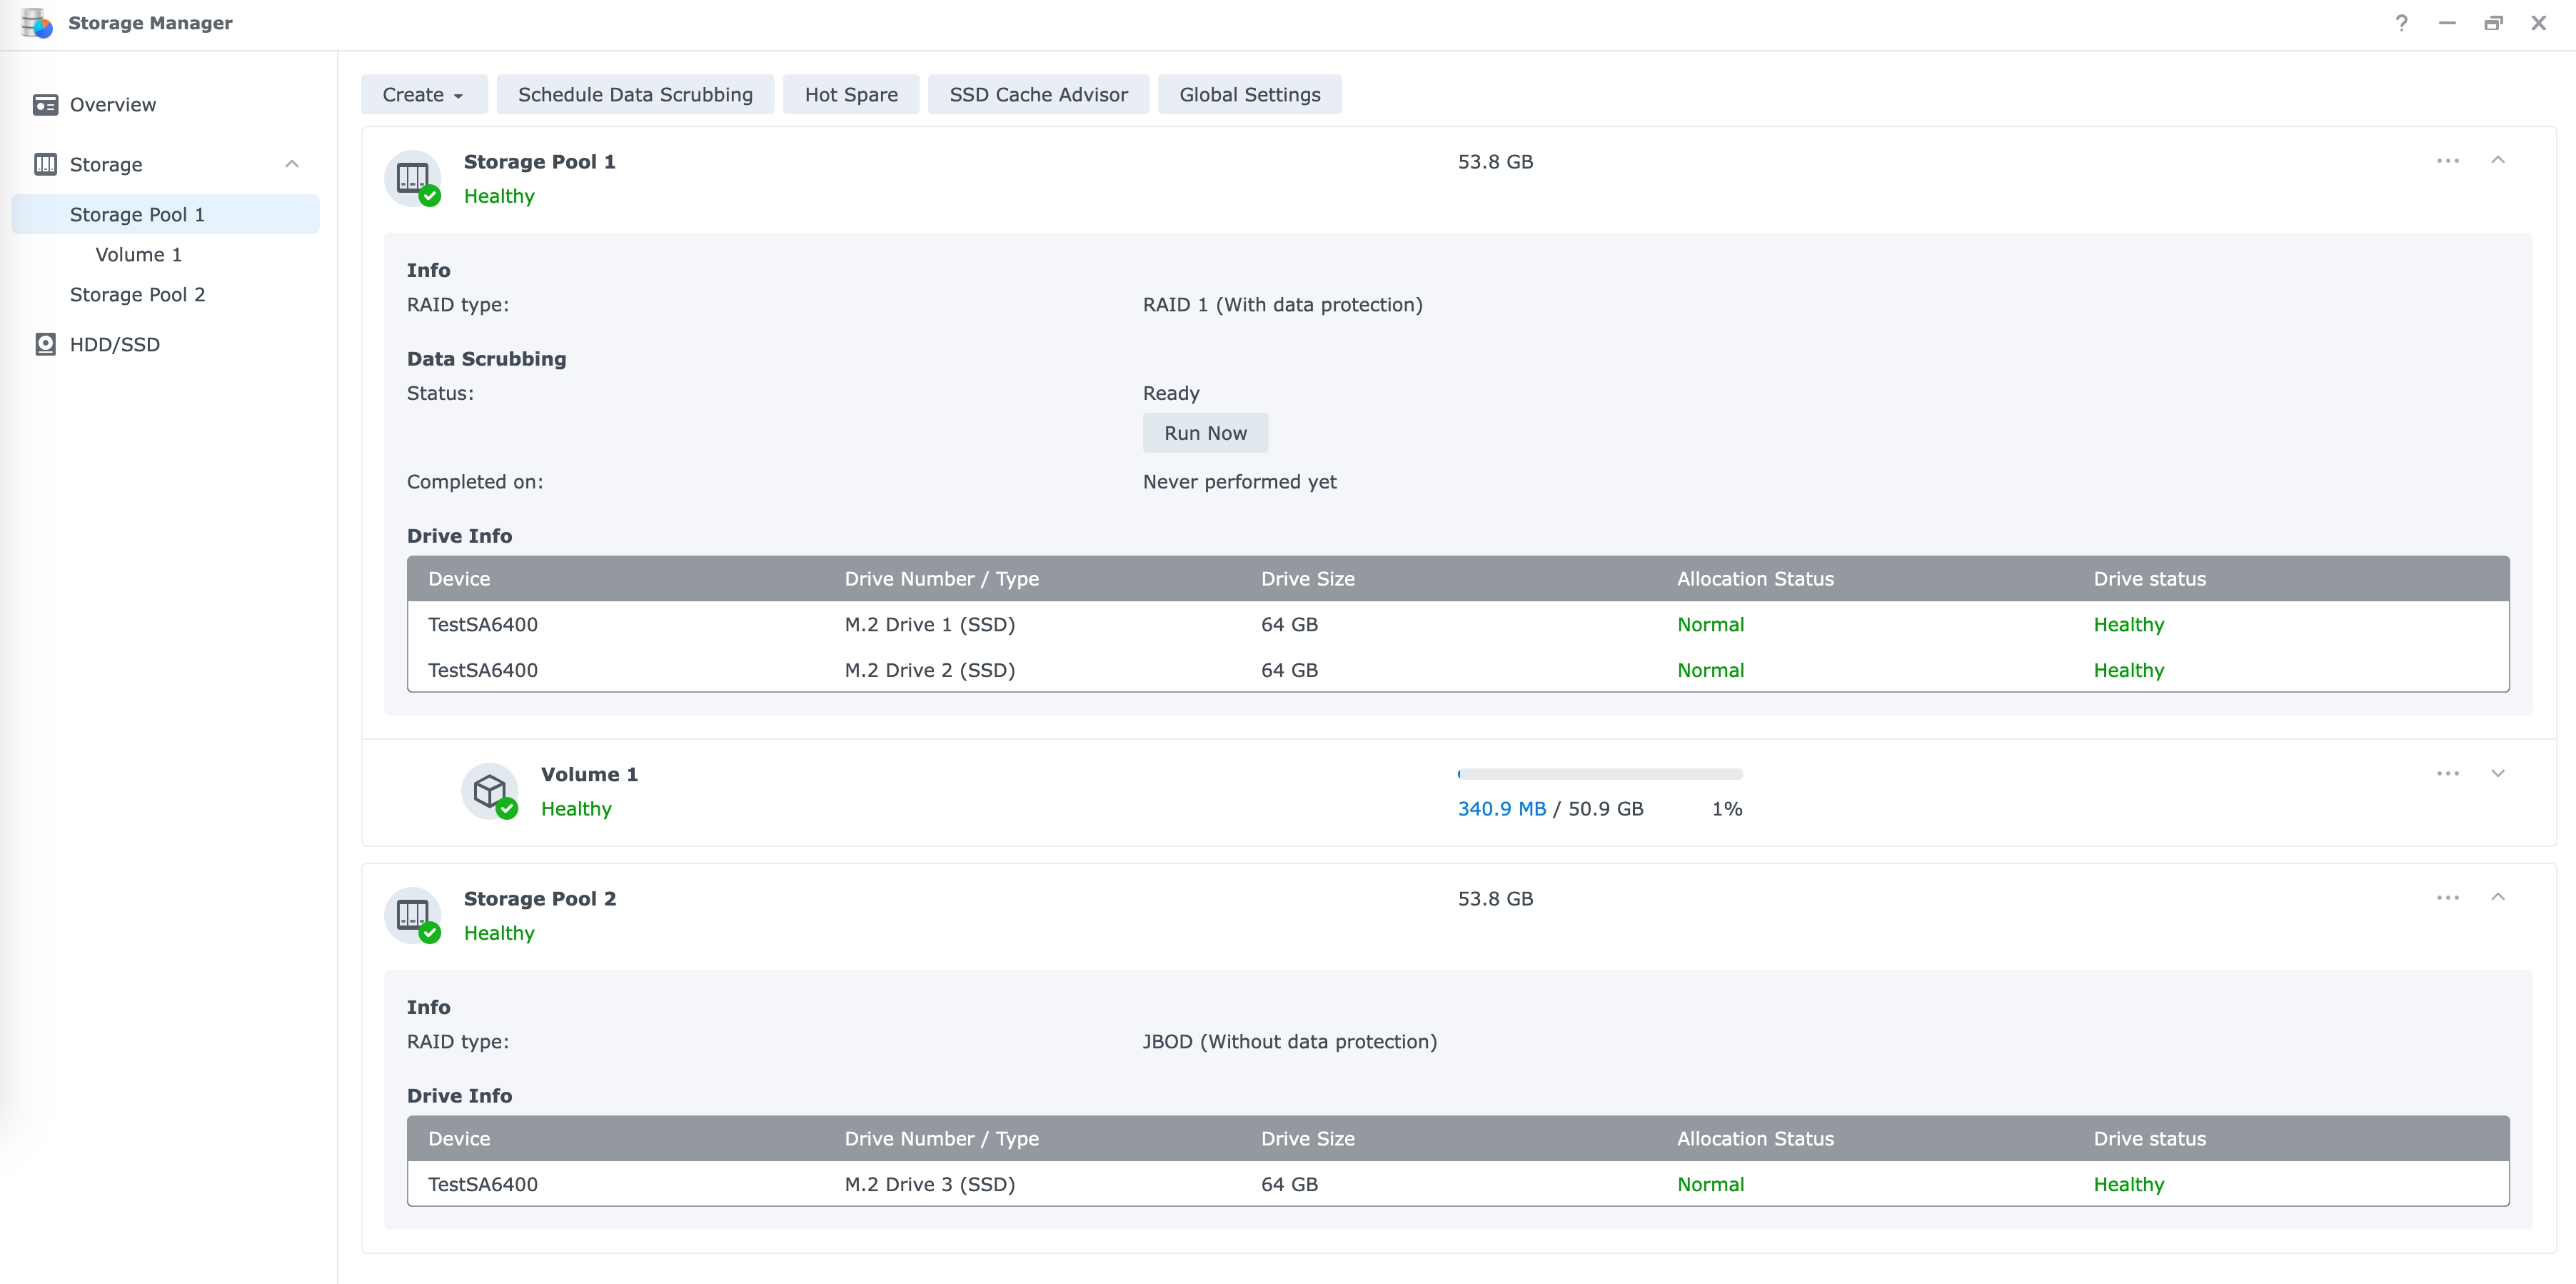
强制刷新浏览器缓存,终于可以自由创建 NVMe 存储池了。
成果截图:
相关修改汇总
ramdisk 相关修改
- 替换 ramdisk 下的
scemd,跳过disk type的检查,对应函数查找关键字:external_disk_port_enum - 修改 /linuxrc.syno.impl:
sed -i \'s/WithInternal=0/WithInternal=1/\' ${RAMDISK_PATH}/linuxrc.syno.impl
安装系统后相关修改
- 替换系统下的 libhwcontrol.so.1,跳过查找 SATA 盘的检查,对应的函数为:
SLIBDiskInfoEnumToCache - 修改 storage_panel.js:
e.portType||e.isCacheTray()->e.portType,以加载正确的磁盘 RAID 类型


暂无评论内容